
Today, I want to show you how I use Ansible, Flask, MongoDB, TextFSM and Pandas to generate Excel reports. This will be a simplified example. Typically, I collect various data and create a grid in a new collection with the information I need. In this straightforward example, I’ll demonstrate how I use Ansible to gather MAC addresses from switches, send this data to MongoDB via a Flask API, and then generate a final Excel list from this data. Enjoy! 😊
At a glance#
Workflow overview#
- Inventory collection
- Ansible retrieves the inventory from Netbox with the netbox_inventory plugin.
- Data gathering
- Ansible connects to the devices and executes the
show mac address-tablecommand. - The output is parsed using TextFSM, converting it into a list of dictionaries.
- Data storage
- The parsed data, along with the hostname, is sent via POST to the API of the report stack.
- The data is stored in MongoDB, which offers the big advantage of needing no schema definition, allowing for flexible data storage.
- Depending on the use case, entries in the database can either be automatically deleted after a defined period (expire documents) or the database can be cleared at the start of data collection (remove documents).
- Grid generation
- This step is skipped in this easy example. In the real world, you might aggregate data from different collections, such as switch data and firewall data, before moving on to report generation.
In the article Working with MongoDB & Python I show how to query and aggregate data in MongoDB.
- Report generation
- The report generator loads the data from the MongoDB collection.
- It enhances the Excel output by adding a title, adjusting column widths, setting up filters, and more.
Now let’s look at the individual components.
General#
I use the existing Netbox in my lab. Please refer to my other articles for more information on Netbox.
File structure#
The lab is organized into three folders:
- ansible: This is the root folder for our CLI ansible
- report_builder: Here we generate the reports
- report_stack: MongoDB + API docker environment
livelab_automating_excel_reports
├── ansible
│   ├── ansible.cfg
│   ├── collect_mac_table.yml
│   ├── collections
│   │   └── requirements.yml
│   ├── group_vars
│   │   └── all
│   ├── inventory.yml
│   └── textfsm
│       └── cisco_ios_show_mac-address-table.textfsm
├── report_builder
│   └── generate_report.py
├── report_stack
│   ├── app
│   │   ├── app.py
│   │   └── start_api.py
│   ├── Dockerfile
│   ├── docker-compose.yaml
│   └── requirements.txt
└── requirements.txt
Generate lab python virtual environment#
# You can clone the project and create directly in the folder the venv
git clone https://github.com/lanbugs/livelab_automating_excel_reports.git
# switch to repo
cd livelab_automating_excel_reports
# Generate venv
python3 -m venv .venv
# Switch to venv
source .venv/bin/activate
# Install the requirements
pip install -r requirements.txt
Inventory collection#
In this demo I use the CLI variant of Ansible, if you want to use Ansible Tower see my article Interaction with REST API <-> Ansible playbook.
Connect Ansible -> Netbox#
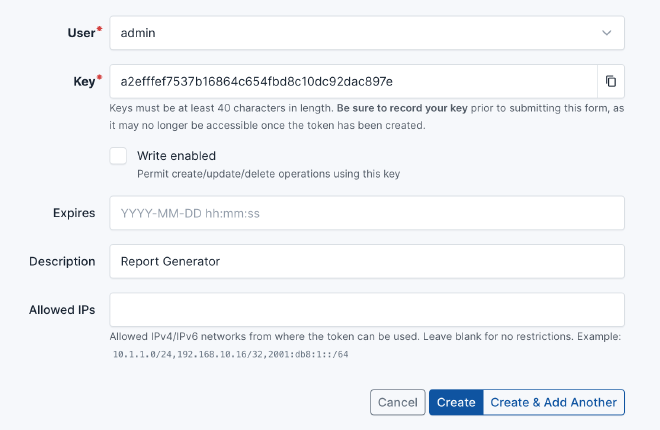
Generate a read only token in Netbox, modify ansible/inventory.yml add correct url and set your new token.
---
plugin: netbox.netbox.nb_inventory
api_endpoint: http://localhost:8000
token: a2efffef7537b16864c654fbd8c10dc92dac897e
validate_certs: False
config_context: True

group_by:
  - device_roles

device_query_filters:
  - has_primary_ip: 'true'
  - status: active
Validate connection#
You can check your connection to Netbox with the command ansible-inventory -v --list -i inventory.yml.
cd ansible
ansible-inventory -v --list -i inventory.yml


Using /Users/netdevops/_DEV/livelab_automating_excel_reports/ansible/ansible.cfg as config file
Using inventory plugin 'ansible_collections.netbox.netbox.plugins.inventory.nb_inventory' to process inventory source '/Users/netdevops/_DEV/livelab_automating_excel_reports/ansible/inventory.yml'
Fetching: http://localhost:8000/api/status
Fetching: http://localhost:8000/api/dcim/devices/?limit=0&has_primary_ip=true&status=active
Fetching: http://localhost:8000/api/virtualization/virtual-machines/?limit=0
Fetching: http://localhost:8000/api/dcim/sites/?limit=0
Fetching: http://localhost:8000/api/dcim/regions/?limit=0
Fetching: http://localhost:8000/api/dcim/site-groups/?limit=0
Fetching: http://localhost:8000/api/dcim/locations/?limit=0
Fetching: http://localhost:8000/api/tenancy/tenants/?limit=0
Fetching: http://localhost:8000/api/dcim/device-roles/?limit=0
Fetching: http://localhost:8000/api/dcim/platforms/?limit=0
Fetching: http://localhost:8000/api/dcim/device-types/?limit=0
Fetching: http://localhost:8000/api/dcim/manufacturers/?limit=0
Fetching: http://localhost:8000/api/virtualization/clusters/?limit=0
Fetching: http://localhost:8000/api/ipam/services/?limit=0
Fetching: http://localhost:8000/api/dcim/racks/?limit=0
[WARNING]: Invalid characters were found in group names but not replaced, use -vvvv to see details
{
    "_meta": {
        "hostvars": {
            "testswitch": {
                "ansible_connection": "network_cli",
                "ansible_host": "10.1.1.1",
                "ansible_network_os": "ios",
...
If you can see this output everything is working fine :-)
Set your credentials#
The credentials to access your testswitch are stored in ansible/group_vars/all file, modify it to fit your environment.
ansible_user: "automation"
ansible_ssh_pass: "Pa55w0rd"
ansible_connection: network_cli
ansible_network_os: ios
Data gathering#
To collect the MAC addresses from the switches, I created a small playbook, ansible/collect_mac_table.yml. You will need to modify the API URL and the hosts group name to match your environment.
---
- name: Collect mac addresses of switches
  hosts: device_roles_access-switch
  gather_facts: False

  connection: network_cli

  tasks:
    - name: Collect mac addresses
      cisco.ios.ios_command:
        commands:
          - show mac address-table
      register: mac_table_output

    - name: Parse with textfsm
      ansible.builtin.set_fact:
        macs: "{{ mac_table_output.stdout[0] | parse_cli_textfsm('textfsm/cisco_ios_show_mac-address-table.textfsm')}}"

    - name: Send data to API
      uri:
        url: http://localhost:5555/add_mac_record
        method: POST
        body_format: json
        headers:
          Content-Type: application/json
        body:
          hostname: "{{ inventory_hostname }}"
          data: "{{ macs }}"
The ansible/textfsm folder contains the parsing file for the show mac address-table output.
You can find many ready-to-use TextFSM files at GitHub - networktocode/ntc-templates.
Once we have started our data storage, we can test the playbook.
Data storage#
docker-compose.yaml#
The docker-compose.yaml file includes our API for receiving data from Ansible,
as well as MongoDB. To facilitate inspection via a web interface, Mongo-Express is also included.
---
version: "3.8"

services:
  collector:
    image: report_collector:1.0
    build:
      dockerfile: Dockerfile
    ports:
      - "5555:5000"
    depends_on:
      - mongodb

  mongodb:
    image: mongo
    restart: always
    environment:
      MONGO_INITDB_ROOT_USERNAME: root
      MONGO_INITDB_ROOT_PASSWORD: example
    ports:
      - "27017:27017"

  mongo-express:
    image: mongo-express
    restart: always
    ports:
      - "8777:8081"
    environment:
      ME_CONFIG_MONGODB_ADMINUSERNAME: root
      ME_CONFIG_MONGODB_ADMINPASSWORD: example
      ME_CONFIG_MONGODB_URL: mongodb://root:example@mongodb:27017/
      ME_CONFIG_BASICAUTH: false
app/app.py#
The API has a single route, /add_mac_record, which is used to receive MAC address tables.
Upon receiving the data, the dictionary keys are converted to lowercase,
and the MAC addresses are transformed from the XXXX.XXXX.XXXX format
to the xx:xx:xx:xx:xx:xx standard format. Only dynamic MAC records
are stored in the database, and each record is assigned an additional
field called hostname.
from flask import Flask, request
from pymongo import MongoClient
import re

app = Flask(__name__)

username = 'root'
password = 'example'
host = 'mongodb'
port = 27017
connection_string = f'mongodb://{username}:{password}@{host}:{port}/'

client = MongoClient(connection_string)
db = client['mac_records']
collection = db['records']


def format_mac(mac: str) -> str:
    """ Convert any MAC format to uniform xx:xx:xx:xx:xx:xx format """
    mac = re.sub('[.:-]', '', mac).lower()  # remove delimiters and convert to lower case
    mac = ''.join(mac.split())  # remove whitespaces
    assert len(mac) == 12  # length should be now exactly 12 (eg. 008041aefd7e)
    assert mac.isalnum()  # should only contain letters and numbers
    # convert mac in canonical form (eg. 00:80:41:ae:fd:7e)
    mac = ":".join(["%s" % (mac[i:i+2]) for i in range(0, 12, 2)])
    return mac


def lower_case_keys(dictionary):
    """
    :param dictionary: A dictionary object.
    :return: A dictionary with all keys converted to lowercase.

    This method takes a dictionary and recursively converts all keys to lowercase. If the input dictionary is nested, the method will also recursively convert keys of nested dictionaries and lists to lowercase. If a non-dictionary or non-list object is encountered, it will be returned as is.
    """
    if isinstance(dictionary, dict):
        return {k.lower(): lower_case_keys(v) for k, v in dictionary.items()}
    elif isinstance(dictionary, list):
        return [lower_case_keys(item) for item in dictionary]
    else:
        return dictionary


@app.route('/add_mac_record', methods=['POST'])
def add_mac_record():
    try:
        data = lower_case_keys(request.json)
        buffer = []

        for record in data['data']:
            # we want only dynamic records
            if 'DYNAMIC' in record['type']:
                # add hostname
                record['hostname'] = data['hostname']
                # uniform mac address
                record['destination_address'] = format_mac(record['destination_address'])
                buffer.append(record)

        # push our buffer to mongo
        for dataset in buffer:
            if collection.count_documents(dataset) == 0:
                collection.insert_one(dataset)
            else:
                # update create (not used in demo)
                pass

        return {'message': 'Record added successfully'}, 200
    except Exception as e:
        return {'message': str(e)}, 500

if __name__ == '__main__':
    app.run(host='0.0.0.0', port=5555, debug=True)
Fire up API & MongoDB#
cd report_stack
docker-compose up -d

[+] Running 1/1
 ! collector Warning pull access denied for report_colletor, repository does not exist or may ...                    2.3s
[+] Building 5.6s (10/10) FINISHED                                                                   docker:desktop-linux
 => [collector internal] load .dockerignore                                                                          0.0s
 => => transferring context: 2B                                                                                      0.0s
 => [collector internal] load build definition from Dockerfile                                                       0.0s
 => => transferring dockerfile: 308B                                                                                 0.0s
 => [collector internal] load metadata for docker.io/library/python:3.11-slim-buster                                 1.6s
 => [collector 1/5] FROM docker.io/library/python:3.11-slim-buster@sha256:c46b0ae5728c2247b99903098ade3176a58e274d9  0.0s
 => [collector internal] load build context                                                                          0.0s
 => => transferring context: 3.10kB                                                                                  0.0s
 => CACHED [collector 2/5] WORKDIR /app                                                                              0.0s
 => [collector 3/5] COPY ./app .                                                                                     0.0s
 => [collector 4/5] COPY requirements.txt ./requirements.txt                                                         0.0s
 => [collector 5/5] RUN pip3 install -r requirements.txt                                                             3.8s
 => [collector] exporting to image                                                                                   0.1s
 => => exporting layers                                                                                              0.1s
 => => writing image sha256:16e6701c7b0e586b8799a99beb6c260e3d68bed8b29ad7936fbd2fceb3cfed82                         0.0s
 => => naming to docker.io/library/report_colletor:1.3                                                               0.0s
[+] Running 4/4
 ✔ Network report_stack_default            Created                                                                   0.0s
 ✔ Container report_stack-mongodb-1        Started                                                                   0.6s
 ✔ Container report_stack-mongo-express-1  Started                                                                   0.5s
 ✔ Container report_stack-collector-1      Started                                                                   0.6s
Run ansible playbook#
You can switch back to the ansible folder and run the playbook.
cd ../ansible

ansible-playbook collect_mac_table.yml

[WARNING]: Invalid characters were found in group names but not replaced, use -vvvv to see details

PLAY [Collect mac addresses of switches] *********************************************************************************

TASK [Collect mac addresses] *********************************************************************************************
ok: [testswitch]

TASK [Parse with textfsm] ************************************************************************************************
ok: [testswitch]

TASK [Send data to API] **************************************************************************************************
ok: [testswitch]

PLAY RECAP ***************************************************************************************************************
testswitch                 : ok=3    changed=0    unreachable=0    failed=0    skipped=0    rescued=0    ignored=0
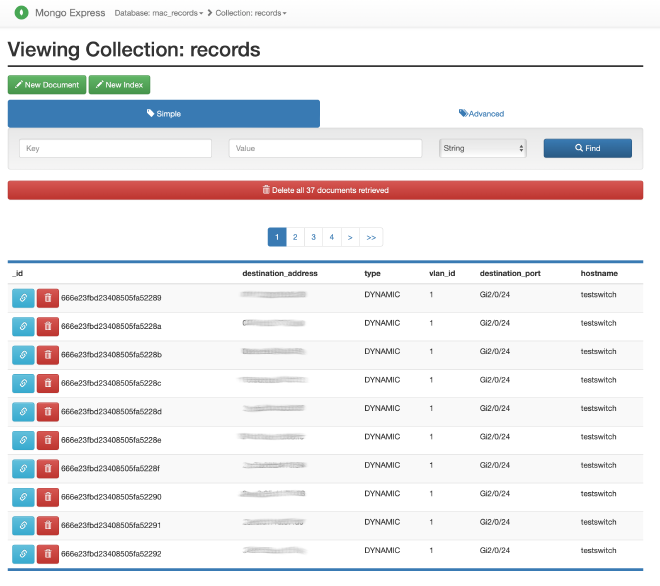
First validation in Mongo-Express#
Goto http://localhost:8777, navigate to mac_records > records and you should see your mac addresses, now we can use the data to generate a report.
Grid generation#
This step is skipped in this easy example. In the real world, you might aggregate data from different collections, such as switch data and firewall data, before moving on to report generation.
Report generation#
Finally we want to create a report from our collected data. In the folder report_builder you find generate_report.py.
generate_report.py#
First we have to load libraries and define the connection parameters to the MongoDB.
from pymongo import MongoClient
import pandas as pd
from openpyxl import load_workbook
from openpyxl.styles import Font, PatternFill
from datetime import datetime
import sys

# Settings
username = 'root'
password = 'example'
host = 'localhost'
port = 27117
connection_string = f'mongodb://{username}:{password}@{host}:{port}/'
This function will optimize our generated report. When you generate an Excel list, pandas will only drop the data into the Excel file without formatting it for you.
The optimize_excel function performs the following transformations:
- Creates a title for the Excel sheet with the date and applies color to it.
- Sets the column header font to bold.
- Enables filters on the column header line.
- Fixes the window so that the title and column header line always remain at the top.
- And most importantly, adjusts the column widths to fit the content.
def optimize_excel(file_path):
    wb = load_workbook(file_path)
    ws = wb.active

    # add title line
    title = f"MAC Export - Date: {datetime.now().strftime('%Y-%m-%d')}"

    ws.insert_rows(1)
    ws['A1'] = title
    ws['A1'].font = Font(bold=True, size=15)

    # Color headline
    header_fill = PatternFill(start_color="ADD8E6", end_color="ADD8E6", fill_type="solid")
    for cell in ws[1]:
        cell.fill = header_fill

    # Set text bold of filter line
    for cell in ws[2]:
        cell.font = Font(bold=True)

    # enable filterline
    ws.auto_filter.ref = f"A2:{ws.dimensions.split(':')[1]}"

    # determine correct column width
    for col in ws.columns:
        max_length = 0
        column = col[0].column_letter
        for cell in col:
            try:
                if len(str(cell.value)) > max_length:
                    max_length = len(cell.value)
            except:
                pass
        adjusted_width = (max_length + 2)
        ws.column_dimensions[column].width = adjusted_width

    # freeze title and filter line
    ws.freeze_panes = ws['A3']

    # save modifications
    wb.save(file_path)
The main function performs the core operations. First, it connects
to MongoDB and retrieves all documents from the mac_records collection.
The documents are stored in the documents variable and are then
converted into a pandas DataFrame. After creating the DataFrame,
we remove the _id column, as the unique document ID from MongoDB
is not needed in our report. The destination_port column contains a list,
which is transformed into a comma-separated string to make it
more human-readable.
Finally, the DataFrame is exported to an Excel document,
and the optimize_excel function is applied to enhance the formatting.
def main(doc):
    # connect to mongo db
    client = MongoClient(connection_string)
    db = client['mac_records']
    collection = db['records']

    # get all documents from collection
    documents = list(collection.find())

    # build dataframe
    df = pd.DataFrame(documents)

    # remove _id column
    df = df.drop(columns=['_id'])

    # convert list to comma seperated string
    df["destination_port"] = df["destination_port"].apply(lambda x: ', '.join(map(str, x)))

    # generate excel file
    df.to_excel(doc, index=False)

    # optimize it
    optimize_excel(doc)


if __name__ == '__main__':
    main(sys.argv[1])
Run it …#
python generate_report.py output_report.xlsx
… after a few seconds, the report is generated. Let’s take a look at it …

Conclusion#
This methodology can be adapted to various use cases, making it a valuable tool for any network automation and data analysis tasks. I hope this example provides a clear and practical guide to implementing a similar solution in your own environment.
Happy automating! 😊